In the last episode of Firebase, Jest, and React, a CRUD-y experience, we did a basic setup for Firebase in the React app. Now we’ve got it set up, it’s time for the fun stuff — CRUD functionality!

CREATE/ADD
You’re probably familiar with making a POST request when it comes to the “C” of CRUD, right? In Firebase, they call it ADD. Here is a basic example of an ADD request with Firebase in React.
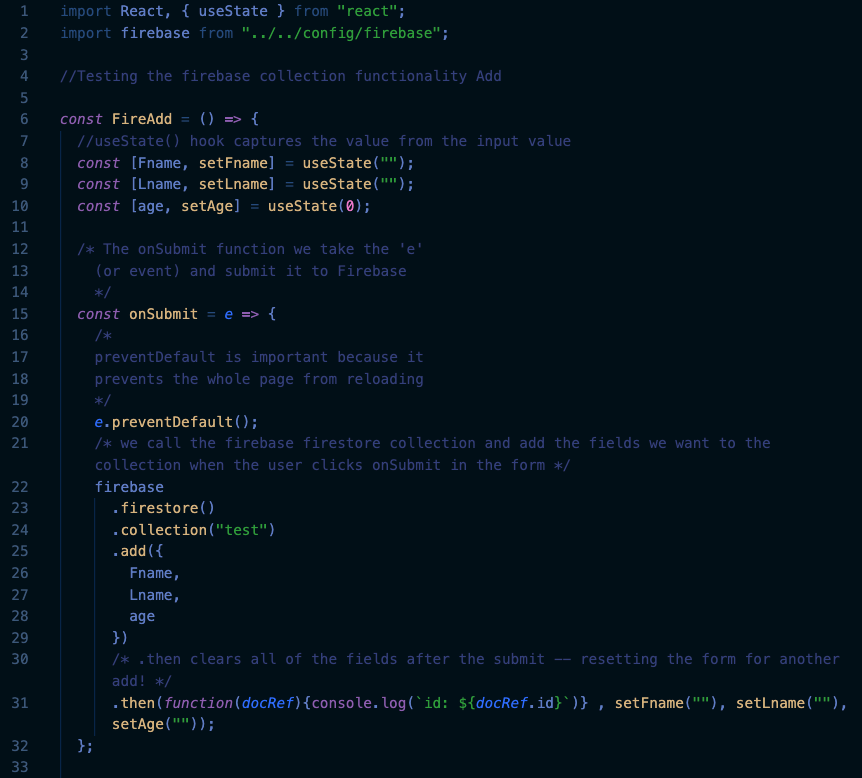
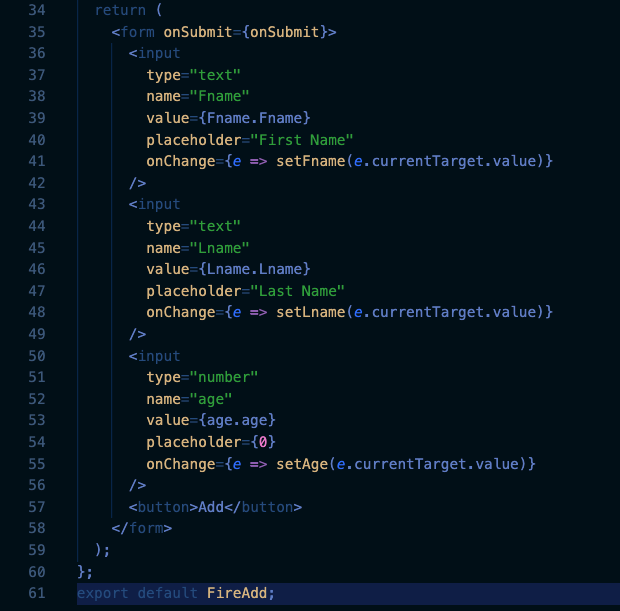
For the most part, it’s familiar territory and super similar to a POST request. I’ve explained the code in comments above, but to summarize — import that Firebase config file (this is the file with your Firebase SDK), import React and create some hooks inside your function. In Firebase, a “collection” is their fancy word for a database. We put the ADD request into an onSubmit() function that we then hooked to a form. You can add it to a button or whatever you like. Easy-peasy. If you’re going the form route, please note that everything inside the .add({ this stuff }) is what will go into your collection.
(Protip 1: If you haven’t yet, read up on the pros and cons of Firebase collections so you know exactly what you’re going to get out of them.)
Generally speaking, here’s what goes into this type of function:
firebase
.firestore()
.collection(“name of your collection from firebase here”)
.add({ stuff you want to add to your collection here })
.then(put your setWhateverses (from the const [whatever, setWhatever] = useState(“”)) here)
Firebase collections have a lot of neat things you can add, including geolocation, so don’t be afraid to dive into that documentation.
(Protip 2: You will want react-router-dom’s useLocation if you want to add geolocation easily in React)
READ/GET
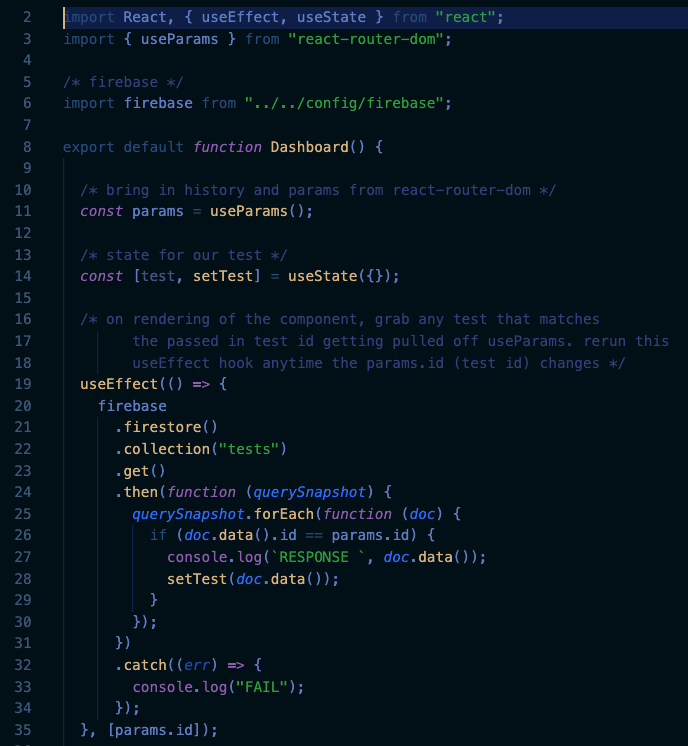
Thankfully, Firebase uses GET like (almost) everybody else for the “R” of its CRUD functionality. Things get exciting in the .then() part, though, where you get to map through a function, check if your parameter id equals your document id (from the collection), and then set your state to that doc.data(). Here is some more Firebase documentation on how to do it.
I won’t spoil your fun, but in the return, (like any good GET request,) you display the things you would like to see returned from mapping through the database.
UPDATE and DELETE
Since they both use the same map function, I found it easier to group UPDATE and DELETE together, but YMMV so take this with a big ole’ grain of salt.
Unlike DELETE, however, UPDATE needed the secret sauce of inputs to actually update. (It could be argued that we might want a form for DELETE, too, so we can only delete certain things from a collection. It’s a great argument, but that’s not happening today. Maybe later.)
To make it all work, I split things up into three files with the following info:
1. A file to map through the collection (where I added the UPDATE and DELETE buttons)
2. A form to UPDATE items in the collection
3. A dashboard file to tie everything together
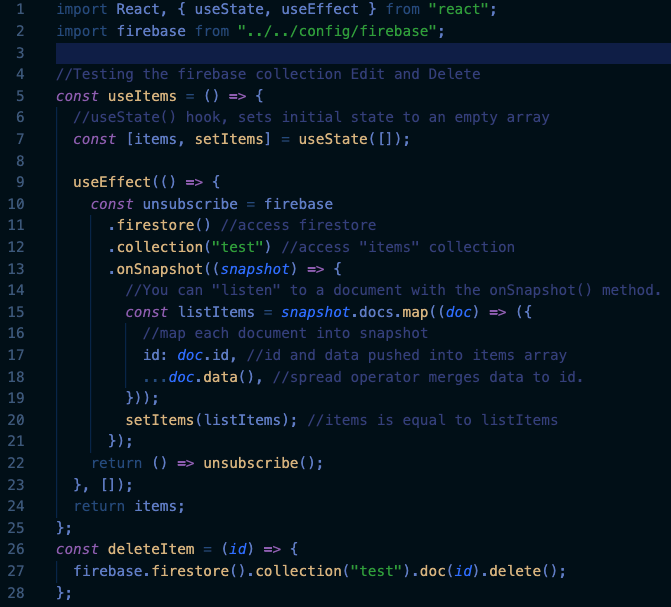
1. Map through Snapshot of Firebase collection and create DELETE Function 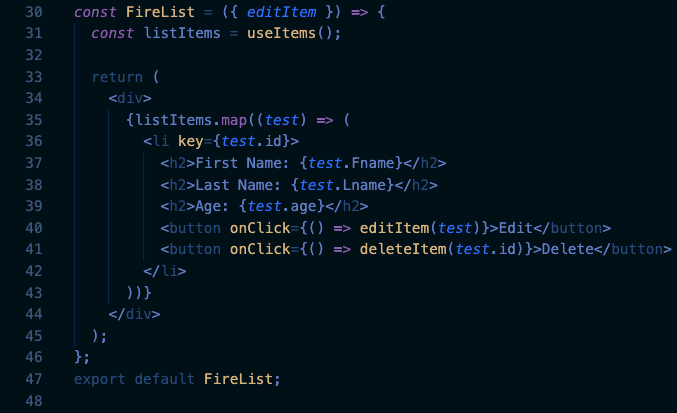
2. Map through the useItems function (with the useEffect in it) and return the results in UPDATE(Edit) and DELETE buttons 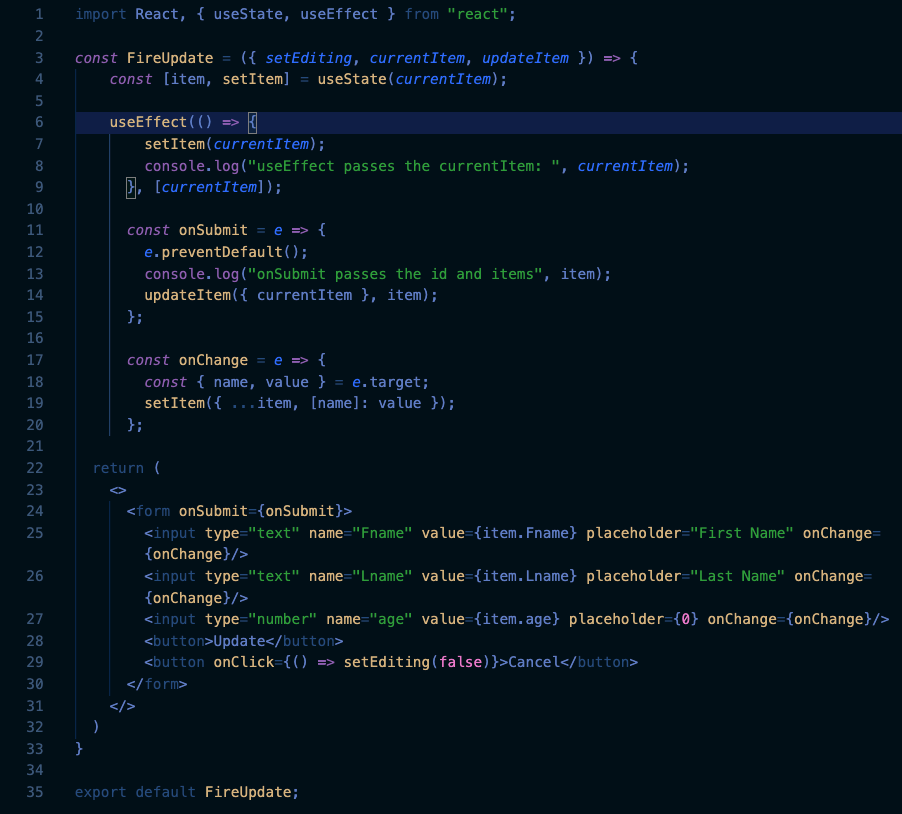
3. Create a form of all the things you would want to update in your collection. 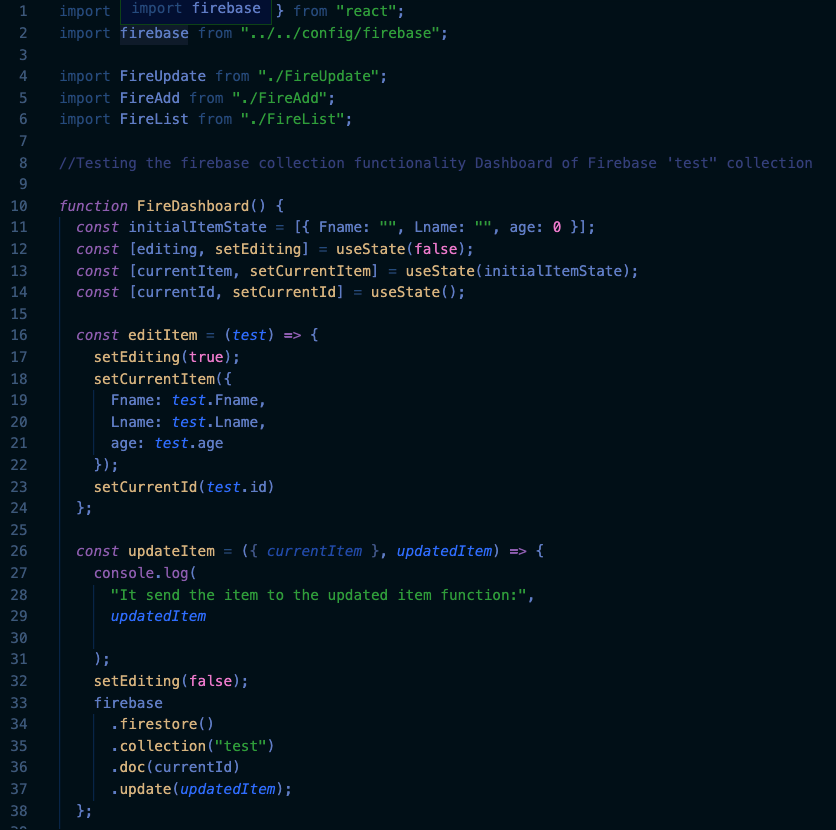
4. Import everything into a central location where you can implement the Firebase UPDATE function to the mapped list. 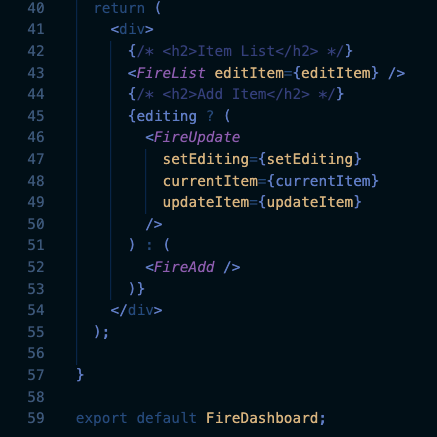
5. Return the list (which has your UPDATE & DELETE, now with updating-magic!). Pull in the ADD (GET) function so you can display everything together
Like I said, YMMV on a better way to do this. Terrible naming conventions aside (seriously, what were you thinking, past me) this was the easiest way for me to keep everything organized. If you want to refactor and share, though, drop me an email!
And now that we’ve done all of this heavy lifting, the only thing we have left is to test our beautiful work with some Jest. OK, so, technically, we should have been testing these as we went, which is how I did it in real life, but since this post is a bit information overload, we’ll save the Jesting for another day.